
Simple No-Knead Homemade Bread Loaf
Homemade bread! What’s not to like? It is dangerous to have around, especially if you are trying to cut down/out carbs.
This is the perfect loaf of bread to make for 1 or 2 people, or for a family for one meal.
This is an easy no-knead bread I make often in the winter. I never was good at kneaded bread. My best friend said one time that if you start a loaf of bread, you’re married to it the whole day! It definitely does take time, and even this easy bread will take a bit of your time. But it’s worth it.
This bread is not only easy, but very versatile. I have seen it brushed with olive oil and topped with garlic flakes/salt, with minced garlic inside. I made it one time with cheese and rosemary. Yummmmmmy. I am sure you could add some cinnamon and sugar and brush olive oil on the top then sprinkle with cinnamon/sugar. Hmmmm. Possibly even add raisins? You know, if you like raisins…Change it up however you want. Get creative.
Today I decided to add some seeds. I added some sunflower and flax seeds and should have added sesame seeds. I went with what I had.
This can also be made into a focaccia or pizza dough – just spread the dough out on a pizza sheet or casserole dish after the first rise and continue to follow the directions for the second rise and baking. I would brush it with some olive oil and a bit of salt and seasonings.
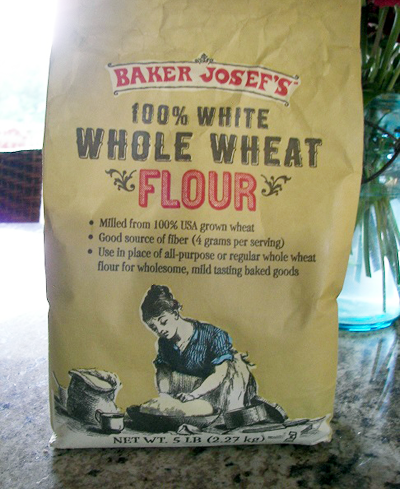
You can use half whole wheat and half white flour or all white flour. Using all whole wheat flour will result in a very dry loaf of bread. I use Trader Joe’s white whole wheat flour. What is it, you ask? I found this definition:….White whole wheat flour is all grain wheat flour that has been milled using “white” or albino wheat rather than the traditional red wheat. It retains many more nutrients than the traditionally bleached white flour. This type of flour produces products that taste more like they were made with bleached flour, so it is often considered the ideal compromise between taste and proper nutrition….
Before I go on, I want to show the difference between good yeast and yeast that has gone bad. I started with some yeast I had in the pantry. After mixing the warm water with the sugar, you put the yeast on top of the water and it should “float,” and get bubbly. However, this is what happened (twice) with my “old” yeast: You can see that the yeast did not “float” or get “foamy,” and that it sunk to the bottom.

I got some fresh yeast out of the freezer, let it warm up a bit, and tried again.
Here is the difference:
You can see that the good yeast gets foamy and stays on top of the warm water while it is proofing. I thought this would be something good to show you, because it is often difficult to know if your yeast is good or not.

Now….finally….on to the recipe!
No-Knead Bread
1 cup water
1 tablespoon sugar
1 teaspoon yeast (regular or instant)
2 cups flour
1 teaspoon salt
1 teaspoon sugar
1 Tablespoon butter (to grease the pan)
I added 1 tablespoon sunflower seeds and 1 tablespoon flax seeds, which I roasted a bit on the stove first, then let cool while I got everything else going.

Get your flour, salt, and 1 teaspoon sugar in a larger bowl. If you want to add anything else (cheese, seeds, etc.) do so now.
Next, get the yeast ready. The best way to make sure your water is at the right temperature is to bring ¼ of it to a boil, then add ¾ of it cold. So put ¼ cup water in the microwave until it boiled, then add ¾ cup cold water to it. Stir in 1 tablespoon sugar until dissolved, then sprinkle 1 teaspoon yeast over the top. Let it sit for about 10-15 minutes while it gets foamy.
Stir it up and add to the flour mixture, stirring just enough to incorporate. Now it needs to sit, covered, in a warm place to rise until about double. This will take a couple of hours.

My mom taught me to heat the oven up to about 100 degrees then turn it off, put the bowl in the oven, and cover it with a dish towel that has been dipped in hot water (and wrung out!) Close the oven door and check on it in about an hour. This ensures that it will be in a warm place.
Mine took a little over an hour before it doubled:

Now it is time to punch the dough down and transfer it into its baking vessel. I have two different pans I make this loaf in. One is a 1L Pyrex bowl and the other is a Le Creuset little loaf pan. I took a picture of both of them in front of a 9×13 pan so you can see their size. I decided to go with the one liter Pyrex bowl this time.

Grease the vessel with a good 1 tablespoon butter. This ensures the bread will come out easily, and you can never have too much butter…. Now you want this to rise again to the top of the bowl, which will take about another 30-45 minutes. I let it sit on the stove while I preheat the oven so it stays warm.

Bake at 425 degrees for 15 minutes, reduce heat to 375 degrees and bake for 15 more minutes. Take out and dump onto a cookie rack immediately. Let cool. Oh, heck, slice off a piece while it’s still warm, even if your husband isn’t home yet and you weren’t going to have it until dinner. Because it’s a law that you have to eat homemade bread, slathered with butter, right out of the oven. Yes. A law.
You can quote me on this one.
